

In gravure printing, flexo coating and high-speed packaging converting, the doctor blade is the one component that decides how much ink or coating actually stays on the roll. A blade that is a few microns out of specification changes the transferred film weight, shifts colour density, and quietly consumes far more ink than the job requires. As an established industrial blades manufacturer, we see the same three root causes behind most ink-metering complaints: an edge profile mismatched to the ink system, a blade thickness chosen by habit rather than by press speed, and a contact angle that was never re-verified after the last blade change. This guide explains how doctor blade edge profiles, thickness, material and installation settings work together, and how to fix the five defects responsible for most unplanned press stops.
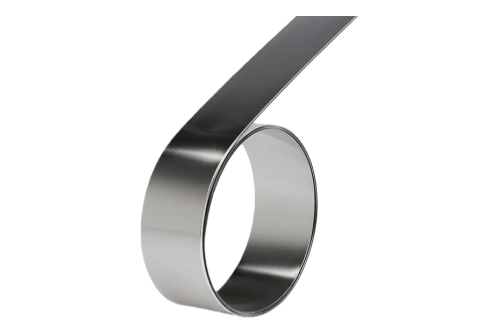
- Edge profile controls film weight stability across the run.
- Blade thickness controls stiffness, and stiffness controls the pressure you need.
- Material and coating decide the change interval on abrasive inks.
- Contact angle and extension decide whether the blade wipes clean or chatters.
1. Doctor Blade Edge Profiles & Ink Metering Behaviour
The edge profile determines how the blade meets the cylinder, how fast the wear land develops, and how stable the ink film stays over a long run. Specify the profile by ink system and run length, not by what happens to be on the shelf:
| Edge Profile | Geometry | Metering & Best Application |
| Lamella (Straight) | 0.10 – 0.20 mm square strip | Least contact area, wipes clean at very low pressure — coating, laminating, flexo anilox. |
| Bevel (Single Angle) | Ground facet, 20° – 35° | Stable film weight, wear land widens gradually — standard publication and packaging gravure. |
| Radius / Rounded | R-controlled edge, no sharp apex | Resists micro-chipping — abrasive white and metallic inks. |
| Coated Edge | Ceramic, TiN or chrome layer | Wear land stays constant — long-run gravure, high-speed coating. |
| Polymer / Composite | Engineered plastic blade | Non-scoring, protects rolls — flexo chambers, delicate anilox rolls. |
The same logic applies further down the line: a clean, burr-free edge is what keeps circular slitting knives and corrugated box grooving blades cutting to tolerance instead of crushing the board.
2. Blade Thickness, Hardness & Contact Angle Settings
Blade thickness governs stiffness, and stiffness governs how much pressure the operator must apply to hold the edge against the cylinder. Choosing the wrong gauge is why many presses run at unnecessarily high doctor pressure, which multiplies both blade wear and cylinder wear:
| Thickness | Hardness | Typical Use |
| 0.10 mm (0.004 in) | 480 – 580 HV | Low-viscosity coating, fine anilox — needs a well-aligned holder. |
| 0.15 mm (0.006 in) | 450 – 580 HV | General gravure, medium-speed coating — the most widely stocked gauge. |
| 0.20 mm (0.008 in) | 500 – 600 HV | High-speed gravure, wide-web presses. |
| 0.25 – 0.30 mm (0.010 – 0.012 in) | 550 – 620 HV | Heavy coating weights, high-viscosity adhesives. |
Setting Notes:
Contact Angle: Most gravure installations run between 55° and 70° at the point of contact. Thin lamella blades work toward the lower end; thicker bevelled blades need a larger angle to present the ground facet rather than the heel.
Blade Extension: Keep free extension out of the holder as short as geometry allows, typically 15 – 25 mm. Excessive extension is the most common cause of blade chatter and the wave pattern it prints across the web.
Minimum Effective Pressure: Run at the lowest pressure that still wipes the cylinder clean. Every extra bar grows the wear land faster and shortens both blade and cylinder life. The same principle governs precision grinding and edge geometry on every industrial knife in the plant.
3. Material Matrix: Carbon Steel, Stainless, Coated & Carbide
Material selection is where blade price and blade life are actually traded off. A coated or carbide-tipped doctor blade costs several times more per metre than carbon steel, but on an abrasive ink at speed it can cut blade changes by a factor of three to ten — which is usually where the real saving sits:
| Material | Designation & Feature | Ideal Application |
| High-Carbon Spring Steel | SK5 / C1095 — sharp edge, lowest unit cost | General gravure, solvent inks, short to medium runs. |
| Stainless Steel | AISI 301 / 420 — corrosion resistant | Water-based inks, food-packaging coating, humid plants. |
| Coated Steel | Ceramic / TiN — above 1000 HV, stable wear land | Long runs, TiO2 white inks, high-speed coating. |
| Tungsten Carbide Tip | WC-Co — extreme abrasion resistance | Highly filled coatings, abrasive converting lines. |
| Polymer / Composite | Engineered plastic — non-scoring | Flexo chambered systems, delicate anilox rolls. |
Where the process is shearing rather than metering — sheet trimming, board cutting or perforating — the equivalent upgrade path runs through guillotine and paper cutter blades and serrated industrial knives specified for the substrate, not just the machine.
4. Troubleshooting the Five Most Common Doctor Blade Defects
Almost every metering complaint maps to one of five failure signatures. Identifying which one you are looking at tells you whether the fix is a setting change, a specification change, or a maintenance task:
- Streaking or drag lines running in the machine direction.
- Hazing, where a uniform film of ink survives the blade.
- Scoring, with visible damage appearing on the cylinder surface.
- Premature wear, where the blade is consumed far ahead of the planned interval.
- Chatter marks, producing a regular wave or bar pattern across the web.
Defect Analysis:
Streaking: Usually a nicked edge or a hard particle trapped between blade and cylinder. Replace the blade, check ink filtration, and inspect the holder for dried ink lifting the blade locally.
Hazing: Caused by too little pressure, too shallow a contact angle, or a blade too thin to resist deflection. Raise pressure in small increments, or step up one thickness gauge before adding more pressure.
Scoring: Excessive pressure combined with a hard blade, or abrasive pigment embedded in the edge. Reduce pressure first; if scoring persists, move to a coated or polymer blade with a controlled, non-damaging edge.
Premature Wear: Highly abrasive pigments such as titanium dioxide act as a grinding compound at the contact line. Upgrading to a coated or tungsten carbide tipped blade typically extends the change interval three to ten times.
Chatter Marks: A stiffness problem, not a sharpness problem. Shorten blade extension, step up one thickness, verify holder clamping torque, and confirm the oscillation mechanism runs smoothly. If the edge is already damaged, a scheduled industrial blade sharpening routine will recover it.
5. Installation, Run-In & Maintenance Checklist
A correct specification still fails if the blade goes into a dirty or misaligned holder. This routine protects the cylinder and makes blade consumption predictable enough to plan changeovers instead of reacting to them:
- Clean the holder and backing jaws before every blade change; hardened ink is the main cause of uneven clamping.
- Verify holder parallelism with a feeler gauge so pressure is uniform across the full web width.
- Run in a new blade at reduced pressure, then bring it up to the minimum pressure that wipes clean.
- Keep the oscillation system active to spread wear across the blade width and prevent local grooves.
- Record running hours per blade and set a preventive change interval instead of waiting for a visible defect.
- Store blades flat, dry and oil-wrapped; edge corrosion causes streaks in the first metres of the next run.